Nest box camera - (page 3)
Installing and adjusting the camera
Page 1 - HANDYKAM camera and nest
box review Page 2 - The main components & testing the camera
Page 4 - Where to install the nest box
The HANDYKAM nest box is pre-assembled and it was only a matter of minutes before the items in the pictures below were fixed in place.
Click on any of the three pictures below for an enlarged view
 |
 |
 |
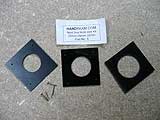
(1) resin window guards |
(2) 25mm, 28mm and 32mm nest hole restrictors |
(3) miniature colour / black & white camera |
(1) The nest box has two innovative resin windows that
allow extra light into the box. (Colour cameras need more light than black
and white cameras to work well.) The windows are translucent and are at
'nest cup' height for maximum effect. The window guards are to protect
the windows and the chicks from gnawing predators such as grey squirrels
and woodpeckers.
(2) Three nest hole reducers are supplied restricting the size of the opening
to 25mm, 28mm or 32mm, if required. You can find out more about the diameters
for different species on the frequently
asked questions page. Blue tits, great tits, house sparrows etc. are welcome
to use this new box so I did not restrict it to just the smallest birds. Sparrows
are gregarious and often nest in purpose made sparrow
terraces.
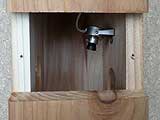
(3) The front, centre section of the nest box has been removed to
enable you to see the camera. This is how the box would be used if you wanted
it as an open fronted nest box for robins. The camera is generally fixed
to the right hand side wall, via a pre-drilled hole, using a washer and wing
nut. This position provides good coverage of the nest cup area and the camera
comes pre focussed for use in this location. Alternatively you can attach
the camera to the ceiling and point it directly at the nest box floor.
Focussing the camera
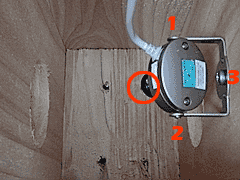
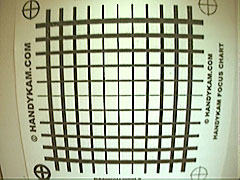
HANDYKAM's camera is pre-focussed for 30mm (1.25 inches) above the nest box floor. This allows for the height of the nesting materials. HANDYKAM even supply you with a focussing chart so you can check out the focus before fixing the nest box in place. To change the camera's focus you simply slacken off the small grub screw on the front of the camera (circled red in the picture below), rotate the lens as required and gently re-tighten the screw. The focus chart is also useful to check that the camera is adequately and equally covering the entire nest cup area. You will need to place the focus chart 30mm from the floor by placing it on small blocks of wood. By slackening screws 1, 2 and 3 in picture 1 you can orientate the camera to centre the image as in picture 2.
 |
 |
Picture 1 - the camera adjusting screws |
Picture 2 - Lens focussing chart |
Even in the small, low resolution picture above you can still read the words HANDYKAM FOCUS CHART on the right of the picture, even though the original text on the chart is only 2mm high. The test picture was taken on a dull October day so this is a very pleasing result and maintains the high standard that HANDYKAM has set throughout in the design of this nest box kit.
Visit the HANDYKAM.COM Home Page by clicking on their logo - |
Other relevant links within this web site
| Sparrow terrace - cutting plans
for a bird box for up to 3 pairs of house sparrows |
| Attract wildlife by feeding the birds and appropriate
planting |